
Photography is an art form that, in the digital age, is accessible to virtually everyone. With the advent of smartphones, cane smartphone photography where we all have a high-quality camera right at our fingertips. But while capturing a photo is as simple as pressing a button, creating truly great images requires a deeper understanding of your tool – in this case, your smartphone camera – and the principles of photography.
This comprehensive guide aims to assist both novice and experienced smartphone photographers in mastering their device’s camera settings, understanding the importance of lighting, particularly natural light, implementing compositional rules such as the Rule of Thirds, exploring different perspectives, knowing when to avoid digital zoom, and finally, editing their photos thoughtfully. By mastering these elements, you can take your smartphone photography to the next level.
Learn Your Camera’s Settings:
All modern smartphones come equipped with a host of settings and features that offer control over the resulting photos. To make the most out of your smartphone’s camera, you need to understand these settings and how to use them effectively.
Exposure: This setting determines how much light your camera’s sensor absorbs. Adjusting the exposure can brighten (overexpose) or darken (underexpose) your images. In most smartphones, exposure can be adjusted by simply tapping the screen and using the exposure slider that appears. Brightening the exposure can help capture more detail in a dark scene, while darkening it can prevent a bright scene from becoming washed out.
Focus: Smartphones typically use autofocus to keep your images sharp, but some also offer manual focus options. By tapping on the specific area or subject on your screen, you can direct your camera to focus there, making it appear the sharpest in the frame. Understanding focus is key, especially in portraits or close-ups, where it’s critical that your main subject stands out clearly.
Aperture: The aperture of a camera is like the pupil of an eye – it controls how much light gets through to the sensor. Many smartphones now come with fixed wide apertures that allow more light in, which is especially beneficial in low-light conditions. A wide aperture also produces a shallow depth of field, which can give you that desirable blurry background, also known as “bokeh.”
ISO: Although automatic in most smartphones, some models allow manual ISO adjustments. ISO controls the camera sensor’s sensitivity to light. Lower values are used in brighter conditions to avoid overexposure, while higher values help in low light. However, a higher ISO can introduce noise or grain into the image, so it’s a delicate balancing act.
White Balance: This setting adjusts the color balance in your images, based on the lighting conditions, to make white objects appear white. While smartphones usually manage this well automatically, some offer manual adjustments. Proper white balance can keep your colors accurate and consistent.
Shooting Modes: Your smartphone camera likely comes with several shooting modes, such as Portrait, Night, Landscape, or even Pro mode. Each mode adjusts settings to suit specific situations, like softening the background in portrait mode or enhancing low-light shots in night mode. Understanding each can greatly improve your results in various conditions.
Resolution: This setting determines the size of your images, which can impact their quality. Higher resolution (more megapixels) allows for more detail and larger prints, but also uses more storage. Balancing your needs is important.
By taking the time to understand these settings, you’ll be better equipped to capture high-quality images in any situation. Smartphone photography isn’t just about pointing and shooting; it’s about making the most of your device’s capabilities.
Maximize Natural Light:
Lighting plays a vital role in any form of photography, and smartphone photography is no exception. The quality, direction, and color of light can significantly influence the mood, texture, and overall success of your photos. Among all types of lighting, natural light is arguably the most desirable, and learning how to make the most of it can drastically elevate your photography.
Quality of Natural Light:
The soft, diffused light of an overcast day or the warm, golden light during the ‘golden hour’ (the first hour after sunrise and the last hour before sunset) often results in beautifully lit photos with rich colors and minimal harsh shadows. Direct midday sunlight, on the other hand, can create high-contrast images with dark shadows and bright highlights, which can be challenging to manage.
Direction of Light:
Understanding and manipulating the direction of light can help create different effects in your photos. Front lighting, where the light source is behind the photographer, can illuminate the subject evenly but may also reduce depth. Backlighting, with the light source behind the subject, can result in a stunning rim of light or a dramatic silhouette. Side lighting can create interesting shadows and depth, highlighting textures.
Color of Light:
Natural light changes in color throughout the day, from the cool, blue tones before sunrise to the warm, golden hues during sunset, and then back to blue during twilight. These changes can drastically impact the mood and visual appeal of your photos.
The flash on a smartphone, while useful in some low-light situations, can often produce harsh, unflattering light, flattening the subject and creating stark shadows. It can also result in red-eye and overexposed subjects. Hence, natural light is often preferable.
Tips to Maximize Natural Light in Smartphone Photography:
- Look for Shade: During harsh midday sun, look for shaded areas to avoid overexposure and stark shadows.
- Use Reflectors: If one side of your subject is too dark, you can use a reflector (or a white piece of paper) to bounce some light back onto it.
- Windows: In indoor settings, windows can act as excellent sources of soft, diffused light.
- Adjust Exposure: Use your smartphone’s exposure adjustment feature to ensure the scene is properly lit.
- HDR Mode: High Dynamic Range (HDR) mode can help manage challenging lighting situations by balancing the light and dark areas of a photo.
By maximizing the use of natural light, you can take advantage of its inherent beauty to create smartphone photos that are vibrant, engaging, and visually pleasing.
Use the Rule of Thirds:
In essence, the Rule of Thirds involves mentally dividing your frame into nine equal rectangles by drawing two equally-spaced horizontal and two equally-spaced vertical lines. The crucial elements or points of interest in your scene are then placed along these lines or, more precisely, at their intersections. This arrangement is perceived as more balanced and natural by the human eye, compared to center-placed subjects, thereby increasing the overall appeal of the image.
Implementation in Smartphone Photography:
Modern smartphones typically have a built-in grid option that superimposes the Rule of Thirds grid over your viewfinder, making it easier to align your subjects along the lines or intersections. Here’s how you can use it to enhance your smartphone photography:
- Horizons: While capturing landscapes, align the horizon with one of the horizontal lines. If the sky is the highlight, let the lower line be the horizon. If the land or sea is more appealing, use the upper line for the horizon.
- Portraits: In portrait photography, place the subject’s eyes along the top horizontal line. If shooting from the side, align the subject’s eye with one of the intersection points.
- Architecture and Structures: Align buildings or tall structures with one of the vertical lines to emphasize height and grandeur.
- Moving Subjects: If your subject is moving, place it on the line opposite to the direction of its movement. This gives the viewer a sense of where the subject is headed, providing a dynamic feel to the image.
- Close-ups and Macro: In close-up shots or macro photography, placing the main point of interest (like the center of a flower or an insect’s eyes) at one of the intersection points can create a more captivating image.
Remember, the Rule of Thirds is a guideline, not a rigid law. There will be instances when breaking this rule might result in more creative and interesting compositions. The goal is to understand its implications and use it as a tool to refine your photographic vision and improve your smartphone photography.
Experiment with Different Perspectives:
Perspective in photography relates to the position or angle from which you capture a subject or scene. It influences the way objects relate to each other in terms of size, space, and position within the frame. Varying your perspective can dramatically change the look and feel of your images, transforming an ordinary scene into an intriguing composition.
- Eye-Level Perspective: This is the most common perspective used in photography as it mirrors our natural viewpoint. But while it can produce appealing results, it may not always be the most creative or engaging approach.
- High Perspective: By shooting from a higher vantage point – such as from a balcony, a hill, or even just by raising your arm – you can capture a bird’s-eye view of your scene. This perspective can offer a comprehensive overview of the scene and lend a unique, detached feel to the image.
- Low Perspective: Conversely, a low perspective involves shooting from a position much lower than eye level. It can make subjects appear more significant or imposing, adding a sense of drama and intensity. This perspective is particularly effective for photographing children, pets, or interesting foreground elements.
- Close-Up Perspective: Getting closer to your subject can reveal intricate details that would be overlooked from a typical viewing distance. This perspective can create striking images, especially in nature or macro photography.
- Unique Angles: Don’t restrict yourself to just vertical or horizontal movements. Tilting your smartphone to capture diagonal lines or rotating it for a vertical shot can also introduce dynamic elements into your composition.
Hot Tip:
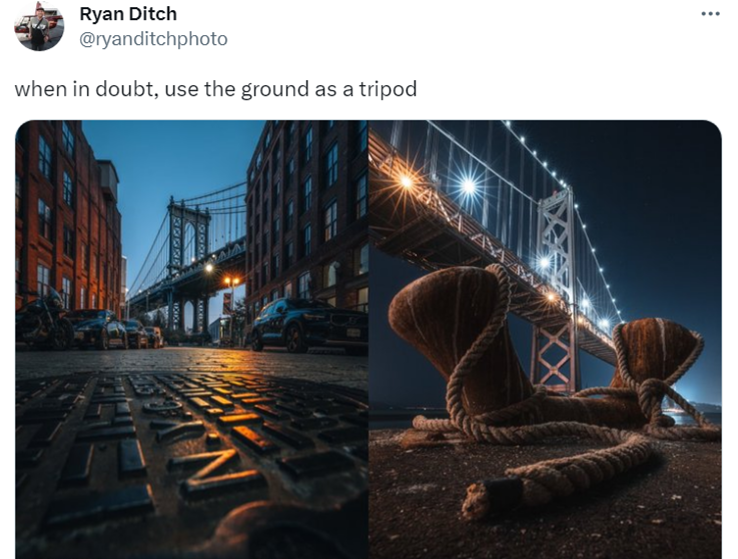
Learn more from Ryan on Twitter.
In smartphone photography, the convenience and portability of the device make it incredibly easy to experiment with different perspectives. So don’t hesitate to crouch down, climb up, or move around to find the most interesting and engaging point of view. Remember, creativity often lies outside of our comfort zones, and exploring different perspectives can help you see and capture the world in unique ways.
Avoid Digital Zoom:
Zooming allows you to get a closer view of a distant subject. However, not all zooms are created equal. There are two types: optical zoom and digital zoom.
Optical Zoom involves the physical movement of lens elements to magnify a scene, which retains the full resolution of the camera sensor for the zoomed-in area. Unfortunately, most smartphones don’t have optical zoom due to the slim design constraints. Instead, they come with a fixed focal length lens, and to compensate, they incorporate a feature known as digital zoom.
Digital Zoom, unlike optical zoom, doesn’t involve any physical adjustment in the lens. Instead, it essentially crops a portion of the image and enlarges it to fill the frame, simulating the effect of getting closer. In this process, you’re losing pixels, and thus, the enlarged image appears pixelated or “grainy” due to the lower resolution. This can significantly degrade the quality of your photos, especially when viewed at larger sizes.
Alternatives to Digital Zoom:
- Physically Move Closer: If possible, the simplest and most effective solution is to move physically closer to your subject. This allows you to retain the full resolution of your camera sensor and avoid the image degradation that comes with digital zoom.
- Use a Telephoto Lens: Some newer smartphones come with multiple lenses, including a telephoto lens that provides 2x or even 3x optical zoom. If your device has one, use it for distant subjects to maintain image quality.
- Crop in Post-Processing: If you can’t get closer and you don’t have a telephoto lens, another option is to capture your photo from a distance and then crop it in post-processing. You’ll still lose some resolution, but typically less than with digital zoom because smartphone cameras often have more resolution than needed for typical uses, such as online sharing.
- Use a Lens Attachment: Various manufacturers offer lens attachments for smartphones that can provide optical zoom capabilities. While these can be somewhat cumbersome, they might be a viable solution if you frequently need to capture distant subjects with your smartphone.
In conclusion, while digital zoom might seem like a convenient feature on your smartphone camera, it’s often best avoided if you aim to achieve the highest image quality. Instead, consider the alternatives suggested above for better results in your smartphone photography.
Edit Thoughtfully:
Post-processing, often simply referred to as ‘editing’, is an integral part of the photography process. It allows you to refine the aesthetic of your photo, correct any issues, and enhance the overall impact of the image. With a plethora of photo editing apps available today, you can edit your smartphone photos with the same level of precision as professional software. However, it’s essential to apply edits thoughtfully to maintain the natural feel of your images.
Maintain Natural Aesthetics:
In photo editing, there’s a fine line between enhancing an image and overdoing it. The goal should be to use editing tools to amplify the natural beauty of your photo, rather than create an overly processed look. Here are some guidelines for thoughtful editing:
- Exposure & Contrast: Start by adjusting the overall brightness (exposure) and contrast of your image. Make sure your image is bright enough to clearly see the subject but avoid blowing out highlights or losing detail in shadows.
- Color Balance: Pay attention to the overall color balance of your photo. Aim for natural-looking colors, unless you’re deliberately creating a specific color mood. Be cautious with saturation and vibrancy controls, as overly saturated colors can look unnatural.
- Sharpness & Clarity: Sharpening can enhance the detail in your photo, but it should be used sparingly. Excessive sharpening can introduce noise and make the image look artificial.
- Cropping & Straightening: These tools can be used to improve the composition of your photo. Crop to highlight the subject and remove distractions. Straighten your image if the horizon or vertical lines aren’t level.
- Special Effects & Filters: While it can be fun to play with various effects and filters, these should typically be used with restraint. A heavily filtered photo can look dated or trendy, and the effect can become tiring over time.
Invest Time in Learning:
Each editing app has its own set of tools and controls, and it can take some time to learn how to use them effectively. Spend some time experimenting with different settings and observe how they affect your photos. Use online tutorials and guides to understand how to use your chosen app to its full potential.
In conclusion, while editing apps can significantly enhance your smartphone photos, remember that less is usually more in editing. By making subtle, thoughtful adjustments, you can create beautiful, natural-looking photos that still retain the essence of the original scene.
Smartphone Photography Conclusion:
Smartphone photography is a powerful medium, merging technology with creativity. As we’ve seen, it goes well beyond merely pressing the shutter button. By understanding and manipulating your device’s camera settings, recognizing and using natural light to your advantage, incorporating rules of composition, exploring different perspectives, avoiding the pitfalls of digital zoom, and applying thoughtful editing, you can create images that not only capture moments but also tell compelling stories. Remember, the best camera is the one you have with you. So take out your smartphone, start exploring its capabilities, and let your creativity flow. The world of smartphone photography is vast, and it’s yours to discover and conquer.
If you enjoyed this article, check out some of our other articles and follow us on Twitter.